bilibili
43.FactoryBean
用于创建过程较为复杂的产品,如 SqlSessionFactory , 但 @Bean 注解替代
被 FactoryBean 创建的产品
a. 被创建 并添加容器, 但是通过日志发现没有经历 依赖注入 、回调 Aware 接口 、初始化阶段 。
b. 初始化后流程会走, 产品可以被代理增强
c. 单例产品 不存储在 BeanFactory 的 singletonObjects 成员中,而是 factoryBeanObjectCache 中
d. 按照名字获取 bean 得到的是产品, 需要名字前加&才能获取工厂对象
FactoryBean是一个接口,可以实现该接口,并指定一个泛型,在重写的方法指定泛型类型对象的创建,然后将实现类交由 Spring 管理,最后 Spring 容器中会增加泛型类型的 Bean。
这个 Bean 并不是完全受 Spring 管理的,或者说是 部分受 Spring 管理。
首先定义 Bean2,交由 Spring 管理:
1
2
3
@Component public class Bean2 {}
定义 bean1,它没有交给 Spring 管理,但是注入了 Bean2、定义初始化方法、实现 Aware 接口:
1
2
3
4
5
6
7
8
9
10
11
12
13
14
15
16
17
18
19
20
21
@Slf4j public class Bean1 implements BeanFactoryAware { private Bean2 bean2; @Autowired public void setBean2 (Bean2 bean2) { log.debug("bean1 setBean2" +bean2); this .bean2 = bean2;} public Bean2 getBean2 () {return bean2;} @PostConstruct public void init () { log.debug("init" ); } @Override public void setBeanFactory (BeanFactory beanFactory) throws BeansException { log.debug("setBeanFactory({})" , beanFactory); } }
定义 Bean1FactoryBean,实现 FactoryBean接口,指定泛型为 Bean1,将其交由 Spring 管理,Bean 的名称是 bean1
1
2
3
4
5
6
7
8
9
10
11
12
13
14
15
16
17
18
19
20
21
22
23
@Slf4j @Component("Bean1FactoryBean") public class Bean1FactoryBean implements FactoryBean <Bean1> { @Override public Bean1 getObject () throws Exception { Bean1 bean1 = new Bean1 (); log.debug("create bean: {}" , bean1); return bean1; } @Override public Class<?> getObjectType() { return Bean1.class; } @Override public boolean isSingleton () { return FactoryBean.super .isSingleton(); } }
从容器获取 名称为 Bean1FactoryBean 的 Bean,发现类型不是写了 @Component("Bean1FactoryBean") 的 Bean1FactoryBean
而是没有写 @Component 的 Bean1:
1
2
3
4
5
6
7
8
9
10
11
@ComponentScan public class a43 { public static void main (String[] args) { AnnotationConfigApplicationContext context = new AnnotationConfigApplicationContext (a43.class); Object bean1FactoryBean = context.getBean("Bean1FactoryBean" ); System.out.println(bean1FactoryBean); context.close(); } }
1
2
17:24:17.720 [main] INFO dai.dawang.sundy.a43FactoryBean.Bean1FactoryBean -- create bean: dai.dawang.sundy.a43FactoryBean.Bean1@20d525 dai.dawang.sundy.a43FactoryBean.Bean1@20d525
Bean1 通过 Bean1FactoryBean#getObject()被创建 并添加容器, 但是通过日志发现没有经历 依赖注入 、回调Aware 接口 、初始化阶段 。
这个 Bean 没有经历 SpringBean 生命周期的任何阶段吗?
定义 Bean1PostProcessor,实现 BeanPostProcessor 接口,在 bean1 初始化前后打印日志:
1 2 3 4 5 6 7 8 9 10 11 12 13 14 15 16 17 18 19 20 21 22 23 24 25 26 @Slf4j @Component public class Bean1PostProcessor implements BeanPostProcessor { @Override public Object postProcessBeforeInitialization (Object bean, String beanName) throws BeansException { if (StrUtil.equals("Bean1FactoryBean" , beanName) && bean instanceof Bean1){ log.info("Bean1PostProcessor.postProcessBeforeInitialization: {}" , beanName); } return BeanPostProcessor.super .postProcessBeforeInitialization(bean, beanName); } @Override public Object postProcessAfterInitialization (Object bean, String beanName) throws BeansException { if (StrUtil.equals("Bean1FactoryBean" , beanName) && bean instanceof Bean1){ log.info("Bean1PostProcessor.postProcessAfterInitialization: {}" , beanName); } return BeanPostProcessor.super .postProcessAfterInitialization(bean, beanName); } }
1
2
3
18 :07 :16.097 [main] INFO dai.dawang.sundy.a43FactoryBean.Bean1FactoryBean -- create bean: dai.dawang.sundy.a43FactoryBean.Bean1@3d34d21118 :07 :16.099 [main] INFO dai.dawang.sundy.a43FactoryBean.Bean1PostProcessor -- Bean1PostProcessor.postProcessAfterInitialization: Bean1FactoryBeandai.dawang.sundy.a43FactoryBean.Bean1@3d34d211
发现 bean1 进行了初始化后的增强逻辑, 但是没有进行初始化前的增强逻辑
创建代理对象的时机就是 初始化后 和 依赖注入之前 ,所以 FactoryBean创建的 Bean 可以进行代理增强 。
下面证明单例 和 产品 和工厂的获取:
1
2
3
4
5
6
7
8
9
10
11
12
13
14
15
16
17
18
19
20
21
22
23
24
@ComponentScan public class a43 { public static void main (String[] args) { AnnotationConfigApplicationContext context = new AnnotationConfigApplicationContext (a43.class); Object bean1FactoryBean = context.getBean("Bean1FactoryBean" ); Object bean1FactoryBean2 = context.getBean("Bean1FactoryBean" ); Object bean1FactoryBean3 = context.getBean("Bean1FactoryBean" ); Object bean1FactoryBean4 = context.getBean("Bean1FactoryBean" ); System.out.println(bean1FactoryBean); System.out.println(bean1FactoryBean2); System.out.println(bean1FactoryBean3); System.out.println(bean1FactoryBean4); System.out.println(context.getBean(Bean1.class)); System.out.println(context.getBean(Bean1FactoryBean.class)); System.out.println(context.getBean("&Bean1FactoryBean" )); context.close(); } }
1
2
3
4
5
6
7
8
9
11:20:19.941 [main] INFO dai.dawang.sundy.a43FactoryBean.Bean1FactoryBean -- create bean: dai.dawang.sundy.a43FactoryBean.Bean1@1190200a 11:20:19.946 [main] INFO dai.dawang.sundy.a43FactoryBean.Bean1PostProcessor -- Bean1PostProcessor.postProcessAfterInitialization: Bean1FactoryBean dai.dawang.sundy.a43FactoryBean.Bean1@1190200a dai.dawang.sundy.a43FactoryBean.Bean1@1190200a dai.dawang.sundy.a43FactoryBean.Bean1@1190200a dai.dawang.sundy.a43FactoryBean.Bean1@1190200a dai.dawang.sundy.a43FactoryBean.Bean1@1190200a dai.dawang.sundy.a43FactoryBean.Bean1FactoryBean@445b295b dai.dawang.sundy.a43FactoryBean.Bean1FactoryBean@445b295b
44.@Indexed 的原理 Spring 在进行组件扫描时,会遍历项目中依赖的所有 jar 包类路径下所有文件,找到 @Component及其衍生注解,
然后将它们组成 BeanDefinition 添加到容器中。
为了优化扫描速度,引入如下依赖,Spring 将扫描过程提前到编译期:
1 2 3 4 5 <dependency > <groupId > org.springframework</groupId > <artifactId > spring-context-indexer</artifactId > <optional > true</optional > </dependency >
1
2
3
4
5
6
7
8
9
10
11
@Component public class Bean1 {} @Component public class Bean2 {} @Component public class Bean3 {}
在同一包路径下创建 a44:
1
2
3
4
5
6
7
8
9
10
public class A44 { public static void main (String[] args) { DefaultListableBeanFactory beanFactory = new DefaultListableBeanFactory (); ClassPathBeanDefinitionScanner scanner = new ClassPathBeanDefinitionScanner (beanFactory); scanner.scan(A44.class.getPackage().getName()); Arrays.stream(beanFactory.getBeanDefinitionNames()).forEach(System.out::println); } }
还记得 <font style="color:#000000;">ClassPathBeanDefinitionScanner</font>的作用吗?
黑马四十九讲容器与Bean 2.4 BeanDefinition 提到 这个类是通过扫描指定包路径下的 @Component 及其派生注解来注册 Bean
1
2
3
4
5
6
7
8
bean1 bean2 bean3 org.springframework.context.annotation.internalConfigurationAnnotationProcessor org.springframework.context.annotation.internalAutowiredAnnotationProcessor org.springframework.context.annotation.internalCommonAnnotationProcessor org.springframework.context.event.internalEventListenerProcessor org.springframework.context.event.internalEventListenerFactory
发现 bean1、bean2、bean3 正常被添加到容器。
在编译生成的 target 目录下 class/META-INF/spring.components文件有
1
2
3
4
5
6
7
dai.dawang.sundy.SundyApplication=org.springframework.stereotype.Component,org.springframework.boot.SpringBootConfiguration dai.dawang.sundy.a43FactoryBean.Bean1FactoryBean=org.springframework.stereotype.Component dai.dawang.sundy.a43FactoryBean.Bean1PostProcessor=org.springframework.stereotype.Component dai.dawang.sundy.a43FactoryBean.Bean2=org.springframework.stereotype.Component dai.dawang.sundy.a44Indexed\u6CE8\u89E3\u539F\u7406.Bean1=org.springframework.stereotype.Component dai.dawang.sundy.a44Indexed\u6CE8\u89E3\u539F\u7406.Bean2=org.springframework.stereotype.Component dai.dawang.sundy.a44Indexed\u6CE8\u89E3\u539F\u7406.Bean3=org.springframework.stereotype.Component
如果删除最后一条信息,再运行?
1
2
3
4
5
6
7
bean1 bean2 org.springframework.context.annotation.internalConfigurationAnnotationProcessor org.springframework.context.annotation.internalAutowiredAnnotationProcessor org.springframework.context.annotation.internalCommonAnnotationProcessor org.springframework.context.event.internalEventListenerProcessor org.springframework.context.event.internalEventListenerFactory
此时只有 bean1、bean2 被添加到容器,也就是说会先以 spring.components文件信息为主。
那么 spring.components是什么呢 ? 在引入 spring-context-indexer依赖后,在编译期根据类是否被 @Indexed注解标记, 来生成 spring.components的内容。
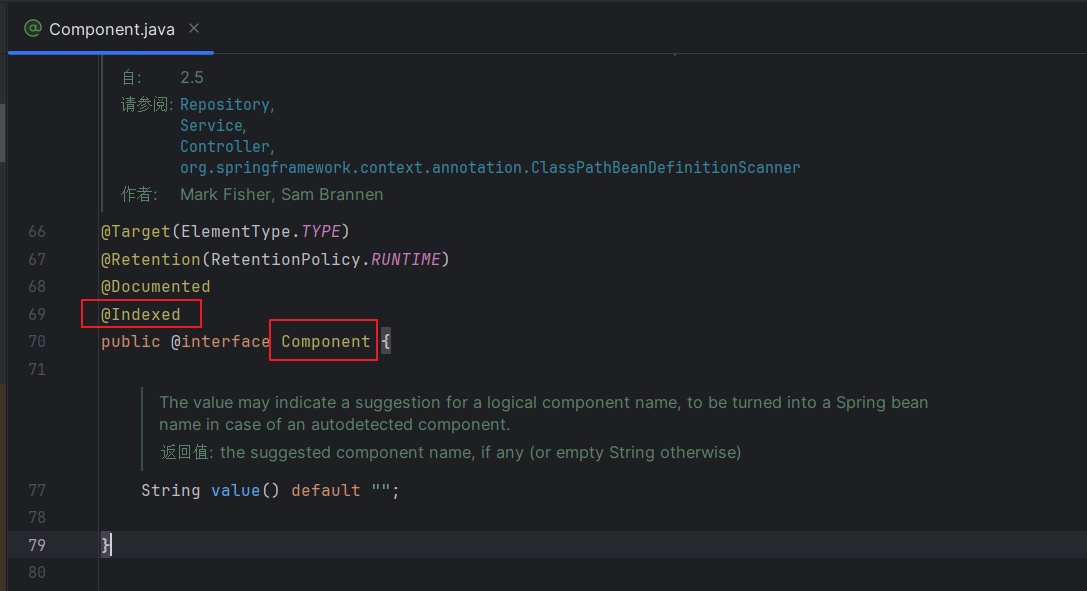
而 @Indexed 就包含在 @Component注解中:
总结 导入 spring-context-indexer依赖后, 在编译期根据 @Indexed生成 class/META-INF/spring.components文件。
Spring 扫描组件时,发现 class/META-INF/spring.components文件存在,以它为准加载 BeanDefinition,
如果没有发现就遍历 Jar 包类路径下所有 class 信息。
45 . Spring 代理进一步理解 在 Spring 的代理中
依赖注入 和 初始化针对的是 目标对象
代理对象 和 目标对象 是两个对象,两者的成员变量不会共享。
确保项目导入:
1 2 3 4 <dependency > <groupId > org.springframework.boot</groupId > <artifactId > spring-boot-starter-aop</artifactId > </dependency >
依赖注入和初始化针对的是目标对象 1 2 3 4 5 6 7 8 9 10 11 12 13 14 15 16 17 18 19 20 21 22 23 24 @Slf4j @Component public class Bean1 { protected Bean2 bean2; protected boolean initialized; @Autowired public void setBean2 (Bean2 bean2) { log.info("setBean2(Bean2 bean2)" ); this .bean2 = bean2; } @PostConstruct public void init () { log.info("Bean1 init" ); initialized = true ; } public Bean2 getBean2 () { return bean2; } }
1 2 3 4 @Slf4j @Component public class Bean2 {}
1 2 3 4 5 6 7 8 9 10 11 @Aspect @Component public class MyAspect { @Before("execution(* dai.dawang.sundy.a45Spring代理的特点.Bean1.*(..))") public void before () { System.out.println("before...." ); } }
有一 SpringBoot 主启动类,它与 Bean1、Bean2 和 MyAspect 在同一包路径下,确保它们能被自动添加到 Spring 容器中:
1 2 3 4 5 6 7 8 9 10 @SpringBootApplication public class A45 { public static void main (String[] args) { ConfigurableApplicationContext context = SpringApplication.run(A45.class, args); Bean1 proxy = context.getBean(Bean1.class); context.close(); } }
1 2 dai.dawang.sundy.a45Spring代理的特点.Bean1 : setBean2(Bean2 bean2) dai.dawang.sundy.a45Spring代理的特点.Bean1 : Bean1 init
Bean1中的依赖注入和初始化被成功执行, 但 并没有被增强 。
Bean1被增强了, 所以从 Spring 容器获取的对象是 代理对象:
1 2 3 4 5 6 7 8 9 10 11 12 13 @SpringBootApplication public class A45 { public static void main (String[] args) { ConfigurableApplicationContext context = SpringApplication.run(A45.class, args); Bean1 proxy = context.getBean(Bean1.class); proxy.setBean2(new Bean2 ()); proxy.init(); context.close(); } }
1 2 3 4 before.... dai.dawang.sundy.a45Spring代理的特点.Bean1 : setBean2(Bean2 bean2) before.... dai.dawang.sundy.a45Spring代理的特点.Bean1 : Bean1 init
主动调用的 setBean2() 和 init()方法** 都被增强** 。
代理对象与明白对象的成员变量不共享 直接访问 代理对象 和 目标对象 的成员变量信息, 而不是通过代理对象去获取目标对象:
1 2 3 4 5 6 7 8 9 10 11 12 13 14 15 16 17 18 19 20 21 22 23 24 25 26 27 28 29 30 31 32 @SpringBootApplication public class A45 { @SneakyThrows public static void main (String[] args) { ConfigurableApplicationContext context = SpringApplication.run(A45.class, args); Bean1 proxy = context.getBean(Bean1.class); proxy.setBean2(new Bean2 ()); proxy.init(); showProxyAndTarget(proxy); context.close(); } public static void showProxyAndTarget (Bean1 proxy) throws Exception{ System.out.println(">>>>>>>>代理中的成员变量" ); System.out.println("\tinitialized= " +proxy.initialized); System.out.println("\tbean2= " +proxy.bean2); if (proxy instanceof Advised advised){ System.out.println(">>>>>>>>目标中的成员变量" ); Bean1 target = (Bean1) advised.getTargetSource().getTarget(); System.out.println(target); System.out.println("\tinitialized= " +target.initialized); System.out.println("\tbean2= " +target.bean2); } } }
1 2 3 4 5 6 7 >>>>>>>>代理中的成员变量 initialized= false bean2= null >>>>>>>>目标中的成员变量 dai.dawang.sundy.a45Spring代理的特点.Bean1@7ae0cc89 initialized= true bean2= dai.dawang.sundy.a45Spring代理的特点.Bean2@de7e193
由于 依赖注入 和 初始化 只针对 目标对象,因此代理对象中的成员变量的值都是初始值。
在实际应用过程,不会直接去访问成员变量,而是通过方法去访问:
1 2 3 4 5 6 7 8 9 10 11 12 13 14 15 16 17 18 19 20 21 22 23 24 25 26 27 28 29 30 31 32 33 34 35 36 @SpringBootApplication public class A45 { @SneakyThrows public static void main (String[] args) { ConfigurableApplicationContext context = SpringApplication.run(A45.class, args); Bean1 proxy = context.getBean(Bean1.class); proxy.setBean2(new Bean2 ()); proxy.init(); showProxyAndTarget(proxy); System.out.println(">>>>>>>>>直接调用代理对象方法" ); System.out.println(proxy.getBean2()); System.out.println(proxy.isInitialized()); context.close(); } public static void showProxyAndTarget (Bean1 proxy) throws Exception{ System.out.println(">>>>>>>>代理中的成员变量" ); System.out.println("\tinitialized= " +proxy.initialized); System.out.println("\tbean2= " +proxy.bean2); if (proxy instanceof Advised advised){ System.out.println(">>>>>>>>目标中的成员变量" ); Bean1 target = (Bean1) advised.getTargetSource().getTarget(); System.out.println(target); System.out.println("\tinitialized= " +target.initialized); System.out.println("\tbean2= " +target.bean2); } } }
1 2 3 4 5 6 7 8 9 10 11 12 >>>>>>>>代理中的成员变量 initialized= false bean2= null >>>>>>>>目标中的成员变量 dai.dawang.sundy.a45Spring代理的特点.Bean1@7ae0cc89 initialized= true bean2= dai.dawang.sundy.a45Spring代理的特点.Bean2@de7e193 直接调用代理对象方法 before.... dai.dawang.sundy.a45Spring代理的特点.Bean2@de7e193 before.... true
通过方法去访问 代理对象 的成员变量 时, 方法是会被增强的, 代理对象中的方法会去调用 目标对象的方法, 从而读取出增强的值。
只会对能被重写的方法进行增强 在 Bean1 里添加如下几个方法:
1 2 3 4 5 6 7 8 9 10 11 12 13 14 15 16 17 18 19 20 @Component public class Bean1 { public void m1 () { System.out.println("m1() 成员方法" ); } final public void m2 () { System.out.println("m2() final 方法" ); } static public void m3 () { System.out.println("m3() static 方法" ); } private void m4 () { System.out.println("m4() private 方法" ); } }
1 2 3 4 5 6 7 8 9 10 11 12 13 14 15 @SneakyThrows public static void main (String[] args) { proxy.m1(); proxy.m2(); Bean1.m3(); Method m4 = Bean1.class.getDeclaredMethod("m4" ); m4.setAccessible(true ); m4.invoke(proxy); context.close(); }
1 2 3 4 5 before m1 () 成员方法m2() final 方法 m3() static 方法 m4() private 方法
能被重写的成员方法成功被增强,但被 final 修饰的、被 static 修饰的方法和私有方法由于无法被重写,因此它们不能被增强。如果想增强这些方法,可以使用 AspectJ 编译器增强或者 Agent 类加载。
46 . @Value 注入底层 解析@Value 在第四讲黑马四十九讲容器与Bean ** 4.2@Autowired@Value后置处理器 **中给工厂设置了 <font style="background-color:rgba(255, 255, 255, 0);">ContextAnnotationAutowireCandidateResolver</font>类,来深入了解一下吧。
1 2 3 4 5 6 public class Bean1 { @Value("${JAVA_HOME}") private String home; @Value("18") private int age; }
这里的 JAVA_HOME 由系统环境变量填充,18 为整型。
解析 @Value需要两步:
获取 @Value注解中的值
解析属性值
1 2 3 4 5 6 7 8 9 10 11 12 13 14 15 16 17 18 19 20 21 22 23 24 25 26 27 28 29 30 @SuppressWarnings("all") @Configuration public class A46 { @SneakyThrows public static void main (String[] args) { AnnotationConfigApplicationContext context = new AnnotationConfigApplicationContext (A46.class); DefaultListableBeanFactory beanFactory = context.getDefaultListableBeanFactory(); ContextAnnotationAutowireCandidateResolver resolver = new ContextAnnotationAutowireCandidateResolver (); beanFactory.setAutowireCandidateResolver(resolver); Field home = Bean1.class.getDeclaredField("home" ); text1(home, resolver, context); } private static void text1 (Field field, ContextAnnotationAutowireCandidateResolver resolver, AnnotationConfigApplicationContext context) { DependencyDescriptor dependencyDescriptor = new DependencyDescriptor (field, Boolean.FALSE); String value = resolver.getSuggestedValue(dependencyDescriptor).toString(); System.out.println(value); value= context.getEnvironment().resolvePlaceholders(value); System.out.println(value); } }
1 2 ${JAVA_HOME} D:\software\work\jdk\jdk8\jdk
1 2 3 4 5 6 7 8 9 10 11 12 13 14 private static void text2 (Field field, ContextAnnotationAutowireCandidateResolver resolver, AnnotationConfigApplicationContext context) { DependencyDescriptor dependencyDescriptor = new DependencyDescriptor (field, Boolean.FALSE); String value = resolver.getSuggestedValue(dependencyDescriptor).toString(); System.out.println("@Value 的 value 属性值: " + value); value= context.getEnvironment().resolvePlaceholders(value); System.out.println("解析得到的值: " + value); System.out.println("解析得到的值的类型: " + value.getClass()); Object age = context.getBeanFactory().getTypeConverter().convertIfNecessary(value, dependencyDescriptor.getDependencyType()); System.out.println("转换后的类型: " + age.getClass()); }
1 2 3 4 @Value 的 value 属性值: 18 解析得到的值: 18 解析得到的值的类型: class java .lang.String 转换后的类型: class java .lang.Integer
EL表达式的解析 @Value 里面还可以写 EL表达式: @Value("#{@bean3}"),表示根据名称找到 bean3 的 bean 同 @Autowired
EL 表达式全称:SpringEL ,简称:SpEL, 用于 #{} 之间
新建如下几个类:
1 2 3 4 5 6 7 8 9 10 11 12 13 public class Bean2 { @Value("#{@bean3}") private Bean3 bean3; } @Component("bean3") public class Bean3 {} static class Bean4 { @Value("#{'hello, ' + '${JAVA_HOME}'}") private String value; }
如果继续使用 test2() 方法解析 Bean2 中的 @Value 注解
1 2 3 4 public static void main (String[] args) { text2(Bean2.class.getDeclaredField("bean3" ), resolver, context); }
会出现:
1 2 3 4 @Value 的 value 属性值: #{@bean3} 解析得到的值: #{@bean3} 解析得到的值的类型: class java.lang.String Failed to convert value of type 'java.lang.String' to required type 'dai.dawang.sundy.a46Value注解的原理.A46$Bean3'; Cannot convert value of type 'java.lang.String' to required type 'dai.dawang.sundy.a46Value注解的原理.A46$Bean3': no matching editors or conversion strategy found
是最后一步类型转换出错, 无法将 String转换为 A46$Bean3。
为了解析成功,需要在转换前解析 EL 表达式 #{}
1 2 3 4 5 6 7 8 9 10 11 12 13 14 15 16 17 18 19 20 21 22 23 24 25 26 27 28 29 30 31 32 public static void main (String[] args) { test3(context, resolver, Bean2.class.getDeclaredField("bean3" )); System.out.println(">>>>>>>>>>>>>>>>>>>>>>>>>" ); text3(Bean4.class.getDeclaredField("value" ), resolver, context); } private static void text3 (Field field, ContextAnnotationAutowireCandidateResolver resolver, AnnotationConfigApplicationContext context) { DependencyDescriptor dependencyDescriptor = new DependencyDescriptor (field, Boolean.FALSE); String value = resolver.getSuggestedValue(dependencyDescriptor).toString(); System.out.println("@Value 的 value 属性值: " + value); value= context.getEnvironment().resolvePlaceholders(value); System.out.println("解析得到的值: " + value); System.out.println("解析得到的值的类型: " + value.getClass()); ConfigurableListableBeanFactory beanFactory = context.getBeanFactory(); Object bean3 = beanFactory.getBeanExpressionResolver().evaluate(value, new BeanExpressionContext (beanFactory, null )); Object result = beanFactory.getTypeConverter().convertIfNecessary(bean3,dependencyDescriptor.getDependencyType() ); System.out.println("转换后的类型: " + result.getClass()); }
1 2 3 4 5 6 7 8 9 @Value 的 value 属性值: #{@bean3} 解析得到的值: #{@bean3} 解析得到的值的类型: class java.lang.String 转换后的类型: class dai.dawang.sundy.a46Value注解的原理.A46$Bean3 >>>>>>>>>>>>>>>>>>>>>>>>> @Value 的 value 属性值: #{'hello, ' + '${JAVA_HOME}'} 解析得到的值: #{'hello, ' + 'D:\software\work\jdk\jdk8\jdk'} 解析得到的值的类型: class java.lang.String 转换后的类型: class java.lang.String
47 . @Autowired 注入底层 @Autowired注解可以注入
成员变量注入
参数类型注入
结果包装为 Optional
结果包装为 ObjectProvider
对 @Lazy 的处理
创建如下 bean:
1 2 3 4 5 6 7 8 9 10 11 12 13 14 15 16 17 18 19 20 static class Bean1 { @Autowired private Bean2 bean2; @Autowired public void setBean2 (Bean2 bean2) { } @Autowired private Optional<Bean2> bean3; @Autowired private ObjectFactory<Bean2> bean4; } @Component("bean2") static class Bean2 {}
准备好环境:
1 2 3 4 5 6 7 8 9 10 11 12 13 14 15 @SuppressWarnings("all") @Configuration public class A47_1 { @SneakyThrows public static void main (String[] args) { AnnotationConfigApplicationContext context = new AnnotationConfigApplicationContext (A47_1.class); DefaultListableBeanFactory beanFactory = context.getDefaultListableBeanFactory(); }
注入方式 按成员变量类注入 实现来解析
1 2 @Autowired private Bean2 bean2
1 2 3 4 5 6 7 8 9 public static void main (String[] args) { AnnotationConfigApplicationContext context = new AnnotationConfigApplicationContext (A47_1.class); DefaultListableBeanFactory beanFactory = context.getDefaultListableBeanFactory(); DependencyDescriptor dependencyDescriptor = new DependencyDescriptor (Bean1.class.getDeclaredField("bean2" ), Boolean.FALSE); System.out.println(beanFactory.doResolveDependency(dependencyDescriptor, "bean1" , null , null )); System.out.println(">>>>>>>>>>>>>>>>>>>>>>>>>>" ); }
1 2 dai.dawang.sundy.a47Autowired注解原理.A47_1$Bean2@33990a0c >>>>>>>>>>>>>>>>>>>>>>>>>>
按参数类型注入 解析
参数类型注入是方法,所以需要获取 Method类,构造 DependencyDescriptor时需要调用 方法或构造函数参数创建新的描述符的构造方法 ,使用到 MethodParameter参数,。
1 2 3 @Autowired public void setBean2 (Bean2 bean2) {}
1 2 3 4 5 6 7 8 public static void main (String[] args) { Method setBean2 = Bean1.class.getDeclaredMethod("setBean2" , Bean2.class); dependencyDescriptor = new DependencyDescriptor (new MethodParameter (setBean2, 0 ), Boolean.FALSE); System.out.println(beanFactory.doResolveDependency(dependencyDescriptor, "bean2" , null , null )); System.out.println(">>>>>>>>>>>>>>>>>>>>>>>>>>" ); }
1 2 dai.dawang.sundy.a47Autowired注解原理.A47_1$Bean2@33990a0c >>>>>>>>>>>>>>>>>>>>>>>>>>
包装为 Optional<Bean2> 解析
由于真正的类型是 Optional 的泛型 Bean2,需要调用 dependencyDescriptor#increaseNestingLevel()方法 获取嵌套内容。
1 2 @Autowired private Optional<Bean2> bean3;
1 2 3 4 5 6 7 8 9 10 11 public static void main (String[] args) { dependencyDescriptor = new DependencyDescriptor (Bean1.class.getDeclaredField("bean3" ), Boolean.FALSE); if (ObjectUtil.equals(Optional.class, dependencyDescriptor.getDependencyType())) { dependencyDescriptor.increaseNestingLevel(); Object result = beanFactory.doResolveDependency(dependencyDescriptor, "bean3" , null , null ); System.out.println(Optional.ofNullable(result)); } System.out.println(">>>>>>>>>>>>>>>>>>>>>>>>>>" ); }
1 2 Optional[dai.dawang.sundy.a47Autowired注解原理.A47_1$Bean2@33990a0c] >>>>>>>>>>>>>>>>>>>>>>>>>>
注入 Optional对象直接使用 @Autowired(require=false)的作用是一样的,
当容器不存在目标 bean 对象时,不会抛出 NoSuchBeanDefinitionException异常。
包装为 ObjectFactory<Bean2> 解析
注入 ObjectFactory<Bean2>类型的对象与注入与 Optional<Bean2> 类型的对象类似,只不过 ObjectFactory 提供了 延迟注入 的能力。
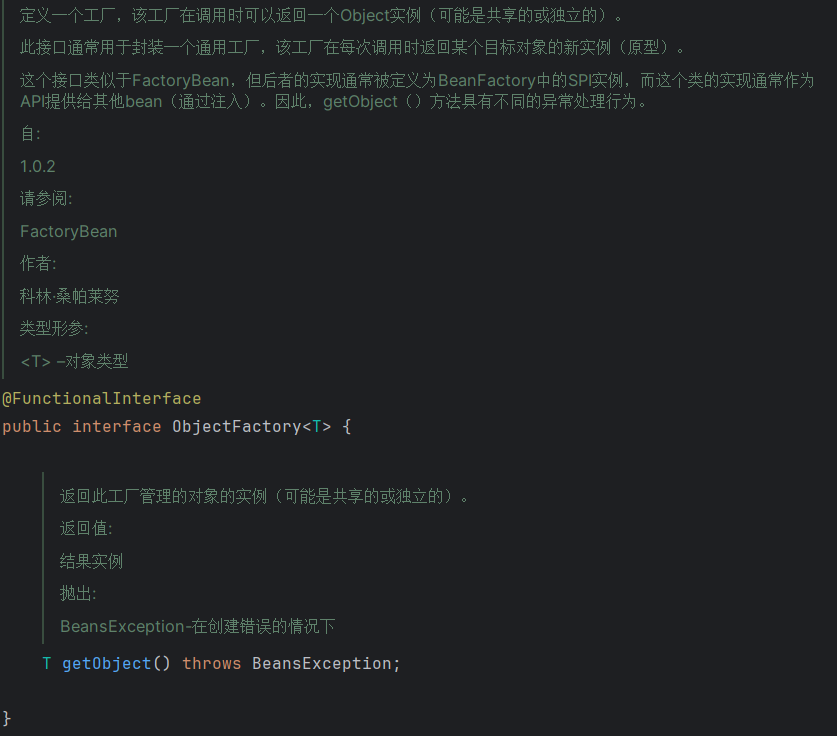
源码的注释上说明了 ObjectFactory与 FactoryBean的区别
接口定义:
FactoryBean提供三个方法getObject()、getObjectType()、isSingleton() <font style="background-color:rgba(255, 255, 255, 0);">ObjectFactory</font>只有一个方法getObject()
使用创建
FactoryBean用于复杂的 bean 创建<font style="background-color:rgba(255, 255, 255, 0);">ObjectFactory</font>用于简单的对象创建和依赖注入
Spring 集成
FactoryBean是 Spring 框架的一部分,广泛用于 Bean 的管理与创建ObjectFactory用于依赖注入,特别在自定义的工厂类只
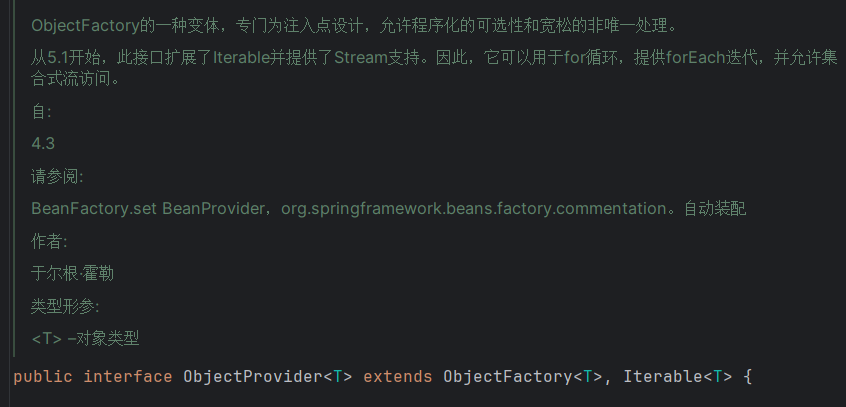
ObjectFactory有个子类 ObjectProvider, 提供了安全注入功能,当容器不存在目标 Bean 时,不会抛出 NoSuchBeanDefinitionException异常。
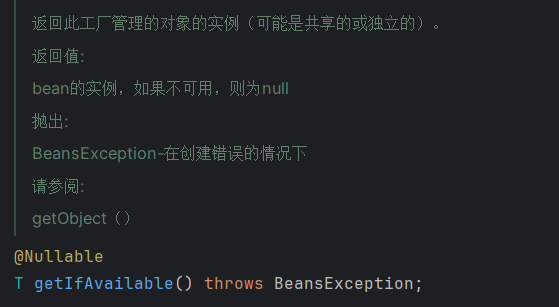
ObjectProvider#getIfAvailable()方法获取不存在的 Bean 时,不会抛出异常,而是返回 null。
当然 ObjectFactory 的子类 ObjectProvider 也提供了 延迟注入 的能力。
1 2 @Autowired private ObjectFactory<Bean2> bean4;
1 2 3 4 5 6 7 8 9 10 11 12 13 14 15 16 public static void main (String[] args) { DependencyDescriptor dd = new DependencyDescriptor (Bean1.class.getDeclaredField("bean4" ), Boolean.FALSE); if (ObjectUtil.equals(ObjectFactory.class, dd.getDependencyType())) { dd.increaseNestingLevel(); ObjectFactory objectFactory = new ObjectFactory () { @Override public Object getObject () throws BeansException { return beanFactory.doResolveDependency(dd, "bean4" , null , null ); } }; System.out.println(objectFactory.getObject()); } System.out.println(">>>>>>>>>>>>>>>>>>>>>>>>>>" ); }
1 2 dai.dawang.sundy.a47Autowired注解原理.A47_1$Bean2@33990a0c >>>>>>>>>>>>>>>>>>>>>>>>>>
对@Lazy 的处理
@Lazy注解可以加在方法上,也可以加在成员变量上
作用是: 创建一个代理对象,访问代理对象的方法时 才会获取 真实的 Target 对象
目的是: 延迟 Target 对象的获取
1 2 3 @Autowired @Lazy private Bean2 bean2;
将 @Lazy 添加到 Bean2 上后,注入的对象就不在是 Bean2 ,而是由 @Lazy 创建的代理对象。
所以不能使用 DefaultListableBeanFactory的 doResolveDependency() 方法来获取注入的对象。
ContextAnnotationAutowireCandidateResolver不仅可以解析 @Value注解 还可以解析@Lazy
1 2 3 4 5 6 7 8 9 10 11 12 public static void main (String[] args) { dependencyDescriptor = new DependencyDescriptor (Bean1.class.getDeclaredField("bean2" ), Boolean.FALSE); ContextAnnotationAutowireCandidateResolver resolver = new ContextAnnotationAutowireCandidateResolver (); resolver.setBeanFactory(beanFactory); Object proxy = resolver.getLazyResolutionProxyIfNecessary(dependencyDescriptor, "bean1" ); System.out.println(proxy); System.out.println(proxy.getClass()); System.out.println(">>>>>>>>>>>>>>>>>>>>>>>>>>" ); }
1 2 3 dai.dawang.sundy.a47Autowired注解原理.A47_1$Bean2@33990a0c class dai .dawang.sundy.a47Autowired注解原理.A47_1$Bean2$$SpringCGLIB$$0 >>>>>>>>>>>>>>>>>>>>>>>>>>
发现控制台打印的类型 已经是被 CGLIB增强后的对象
类型注入总结resolveDependency() Optional 类型、ObjectFactory 类型、ObjectProvider 类型、JSR-330 提供的类型的注入逻辑可在 DefaultListableBeanFactory#resolveDependency() 方法中看到:
1 2 3 4 5 6 7 8 9 10 11 12 13 14 15 16 17 18 19 20 21 22 @Override @Nullable public Object resolveDependency (DependencyDescriptor descriptor, @Nullable String requestingBeanName, @Nullable Set<String> autowiredBeanNames, @Nullable TypeConverter typeConverter) throws BeansException { descriptor.initParameterNameDiscovery(getParameterNameDiscoverer()); if (Optional.class == descriptor.getDependencyType()) { } else if (ObjectFactory.class == descriptor.getDependencyType() || ObjectProvider.class == descriptor.getDependencyType()) { } else if (javaxInjectProviderClass == descriptor.getDependencyType()) { } else { } }
doResolveDependency 方法原理 通过上面的例子发现, 都需要进入 beanFactory#doResolveDependency()方法,
1 2 3 4 5 6 7 8 9 10 11 12 13 14 15 16 17 18 19 20 21 22 23 24 25 26 27 28 29 30 31 32 33 34 35 36 37 38 39 40 41 42 43 44 45 46 47 48 49 50 51 static class Target { @Autowired private Service[] serviceArray; @Autowired private List<Service> serviceList; @Autowired private ConfigurableApplicationContext applicationContext; @Autowired @Qualifier("service2") private Service service; @Autowired private Dao<Teacher> dao; } interface Dao <T> { } @Component("dao1") static class Dao1 implements Dao <Student> { } @Component("dao2") static class Dao2 implements Dao <Student> { } static class Student { } static class Teacher { } interface Service { } @Component("service1") static class Service1 implements Service { } @Component("service2") static class Service2 implements Service { } @Component("service3") static class Service3 implements Service { }
1 2 3 4 5 6 7 8 9 10 11 12 13 14 15 16 @Configuration @SuppressWarnings("all") public class A47_2 { public static void main (String[] args) throws NoSuchFieldException { AnnotationConfigApplicationContext context = new AnnotationConfigApplicationContext (A47_2.class); DefaultListableBeanFactory beanFactory = context.getDefaultListableBeanFactory(); } }
数组类型 1 2 3 4 5 6 7 8 9 10 11 12 13 14 15 16 17 18 19 20 21 22 23 24 25 26 27 28 29 30 31 32 33 34 35 36 public class A47_2 { public static void main (String[] args) throws NoSuchFieldException { AnnotationConfigApplicationContext context = new AnnotationConfigApplicationContext (A47_2.class); DefaultListableBeanFactory beanFactory = context.getDefaultListableBeanFactory(); testArray(beanFactory); } private static void testArray (DefaultListableBeanFactory beanFactory) throws NoSuchFieldException { DependencyDescriptor dd1 = new DependencyDescriptor (Target.class.getDeclaredField("serviceArray" ), Boolean.FALSE); if (dd1.getDependencyType().isArray()) { Class<?> componentType = dd1.getDependencyType().getComponentType(); System.out.println("componentType" + componentType); System.out.println(">>>>>>>>>>>>>>>>>>>>>" ); String[] names = BeanFactoryUtils.beanNamesForTypeIncludingAncestors(beanFactory, componentType); ArrayList<Object> beans = new ArrayList <>(); for (String name : names) { System.out.println("name: " + name); Object bean = dd1.resolveCandidate(name, componentType, beanFactory); beans.add(bean); } System.out.println(">>>>>>>>>>>>>>>>>>>>>" ); Object array = beanFactory.getTypeConverter().convertIfNecessary(beans, dd1.getDependencyType()); System.out.println(array); } } }
1 2 3 4 5 6 7 componentTypeinterface dai.dawang.sundy.a47Autowired注解原理.A47_2$Service >>>>>>>>>>>>>>>>>>>>> name: service3 name: service2 name: service1 >>>>>>>>>>>>>>>>>>>>> [Ldai.dawang.sundy.a47Autowired注解原理.A47_2$Service;@28f3b248
相关源码可在 DefaultListableBeanFactory#resolveMultipleBeans() 方法中看到。
1 2 3 4 5 6 7 8 9 10 11 12 13 14 15 16 17 18 19 20 21 22 @Nullable private Object resolveMultipleBeans (DependencyDescriptor descriptor, @Nullable String beanName, @Nullable Set<String> autowiredBeanNames, @Nullable TypeConverter typeConverter) { Class<?> type = descriptor.getDependencyType(); if (descriptor instanceof StreamDependencyDescriptor) { } else if (type.isArray()) { } else if (Collection.class == type || Set.class == type || List.class == type) { } else if (Map.class == type) { } else { return null ; } }
List 类型 注入 List<Service>类型数据的逻辑与注入 Service[]类型数据的逻辑类似,
只不过容器中寻找目标 Bean 不在通过数组元素类型,而是通过 List 的泛型:
1 2 3 4 5 6 7 8 9 10 11 12 13 14 15 16 17 18 19 20 21 22 23 24 25 26 27 28 29 30 31 32 33 @Configuration @SuppressWarnings("all") public class A47_2 { public static void main (String[] args) throws NoSuchFieldException { AnnotationConfigApplicationContext context = new AnnotationConfigApplicationContext (A47_2.class); DefaultListableBeanFactory beanFactory = context.getDefaultListableBeanFactory(); testList(beanFactory); } private static void testList (DefaultListableBeanFactory beanFactory) throws NoSuchFieldException { DependencyDescriptor dd2 = new DependencyDescriptor (Target.class.getDeclaredField("serviceList" ), Boolean.FALSE); Class<?> resolve = dd2.getResolvableType().getGeneric(0 ).resolve(); String[] strings = BeanFactoryUtils.beanNamesForTypeIncludingAncestors(beanFactory, resolve); ArrayList<Object> beans = new ArrayList <>(); for (String string : strings) { System.out.println("string: " + string); Object bean = dd2.resolveCandidate(string, resolve, beanFactory); beans.add(bean); } System.out.println(beans); } }
1 2 3 4 string: service3 string: service2 string: service1 [dai.dawang.sundy.a47Autowired注解原理.A47_2$Service3@44821a96, dai.dawang.sundy.a47Autowired注解原理.A47_2$Service2@a3d8174 , dai.dawang.sundy.a47Autowired注解原理.A47_2$Service1@1ba9117e]
相关源码在 DefaultListableBeanFactory#resolveMultipleBeans() 方法中看到可以看到:
1 2 3 4 5 6 7 8 9 10 11 12 13 14 15 16 17 18 19 20 21 22 @Nullable private Object resolveMultipleBeans (DependencyDescriptor descriptor, @Nullable String beanName, @Nullable Set<String> autowiredBeanNames, @Nullable TypeConverter typeConverter) { Class<?> type = descriptor.getDependencyType(); if (descriptor instanceof StreamDependencyDescriptor) { } else if (type.isArray()) { } else if (Collection.class == type || Set.class == type || List.class == type) { } else if (Map.class == type) { } else { return null ; } }
特殊类型 ConfigurableApplicationContext 黑马四十九讲容器与Bean 的** 1.1 ****什么是 BeanFactory **中, 说明了 Spring 容器中所有的 单例 Bean 对象 都在
<font style="background-color:rgba(255, 255, 255, 0);">DefaultListableBeanFactory</font>的父类 <font style="background-color:rgba(255, 255, 255, 0);">DefaultSingletonBeanRegistry</font>的成员变量 <font style="background-color:rgba(255, 255, 255, 0);">singletonObjects</font> 在:
类似的 ApplicationContext、Beanfactory对象是放在 DefaultListableBeanFactory的 <font style="background-color:rgba(255, 255, 255, 0);">resolvableDependencies</font>:
这些特殊对象 是在调用 ApplicationContext的 refresh()方法时添加到 resolvableDependencies成员变量中。
1 2 3 4 5 6 7 8 9 10 public void refresh () throws BeansException, IllegalStateException { synchronized (this .startupShutdownMonitor) { prepareBeanFactory(beanFactory); } }
1 2 3 4 5 6 7 8 9 10 protected void prepareBeanFactory (ConfigurableListableBeanFactory beanFactory) { beanFactory.registerResolvableDependency(BeanFactory.class, beanFactory); beanFactory.registerResolvableDependency(ResourceLoader.class, this ); beanFactory.registerResolvableDependency(ApplicationEventPublisher.class, this ); beanFactory.registerResolvableDependency(ApplicationContext.class, this ); }
所以在此注入诸如 ConfigurableApplicationContext特殊类型的对象时, 不能直接使用 getBean()获取,而是从 resolvableDependencies集合中获取。
1 2 3 4 5 6 7 8 9 10 11 12 13 14 15 16 17 18 19 20 21 22 23 24 25 26 27 28 29 30 31 32 33 34 public class A47_2 { public static void main (String[] args) throws NoSuchFieldException ,IllegalAccessException{ AnnotationConfigApplicationContext context = new AnnotationConfigApplicationContext (A47_2.class); DefaultListableBeanFactory beanFactory = context.getDefaultListableBeanFactory(); testApplicationContext(beanFactory); } private static void testGenericParadigm (DefaultListableBeanFactory beanFactory) throws NoSuchFieldException, IllegalAccessException { DependencyDescriptor dd = new DependencyDescriptor (Target.class.getDeclaredField("dao" ), Boolean.FALSE); String[] strings = BeanFactoryUtils.beanNamesForTypeIncludingAncestors(beanFactory, dd.getDependencyType()); ContextAnnotationAutowireCandidateResolver resolver = new ContextAnnotationAutowireCandidateResolver (); resolver.setBeanFactory(beanFactory); for (String string : strings) { BeanDefinition beanDefinition = beanFactory.getMergedBeanDefinition(string); if (resolver.isAutowireCandidate(new BeanDefinitionHolder (beanDefinition, string),dd)) { System.out.println("beanName: " + string); } } } }
1 2 3 4 5 6 7 8 org.springframework.beans.factory.support.DefaultListableBeanFactory@3d121db3: defining beans [org.springframework.context.annotation.internalConfigurationAnnotationProcessor, org.springframework.context.annotation.internalAutowiredAnnotationProcessor, org.springframework.context.annotation.internalCommonAnnotationProcessor, org.springframework.context.event.internalEventListenerProcessor, org.springframework.context.event.internalEventListenerFactory, a47_2,service3,service2,service1,dao2,dao1]; root of factory hierarchy
泛型类型 容器中 Dao类型的 Bean 有多个,而依赖注入的是 Dao<Teacher>类型的对象, 所以需要判断容器中的 Bean 对象泛型类型是否为指定类型。
可以使用 ContextAnnotionAutowireCandidateResolver的 isAutowireCandidate()方法:
1 2 3 4 5 6 7 8 9 10 11 12 13 14 15 16 17 18 19 20 21 22 23 24 25 26 27 private static void testGenericParadigm (DefaultListableBeanFactory beanFactory) throws NoSuchFieldException, IllegalAccessException { DependencyDescriptor dd = new DependencyDescriptor (Target.class.getDeclaredField("dao" ), Boolean.FALSE); String[] strings = BeanFactoryUtils.beanNamesForTypeIncludingAncestors(beanFactory, dd.getDependencyType()); ContextAnnotationAutowireCandidateResolver resolver = new ContextAnnotationAutowireCandidateResolver (); resolver.setBeanFactory(beanFactory); for (String string : strings) { BeanDefinition beanDefinition = beanFactory.getMergedBeanDefinition(string); if (resolver.isAutowireCandidate(new BeanDefinitionHolder (beanDefinition, string),dd)) { System.out.println("beanName: " + string); System.out.println(dd.resolveCandidate(string, dd.getDependencyType(), beanFactory)); } } }
1 2 beanName: dao2 dai.dawang.sundy.a47Autowired注解原理.A47_2$Dao2@5403f35f
解析@Qualifier 注解 当容器中存在多个相同类型的 Bean 对象, 在依赖注入时可以使用 @Qualifier注解指定需要注入的 Bean 对象名称,
判断逻辑同样使用 ContextAnnotationAutowireCandidateResolver的 isAutowireCandidate方法
1 2 3 4 5 6 7 8 9 10 11 12 13 14 15 16 17 18 19 20 21 22 23 private static void testQualifier (DefaultListableBeanFactory beanFactory) throws NoSuchFieldException{ DependencyDescriptor dd = new DependencyDescriptor (Target.class.getDeclaredField("service" ), Boolean.FALSE); String[] strings = BeanFactoryUtils.beanNamesForTypeIncludingAncestors(beanFactory, dd.getDependencyType()); ContextAnnotationAutowireCandidateResolver resolver = new ContextAnnotationAutowireCandidateResolver (); resolver.setBeanFactory(beanFactory); for (String string : strings) { if (resolver.isAutowireCandidate(new BeanDefinitionHolder (beanFactory.getMergedBeanDefinition(string),string), dd)) { System.out.println("string: " + string); System.out.println(dd.resolveCandidate(string, dd.getDependencyType(), beanFactory)); } } }
1 2 tstring: service2 dai.dawang.sundy.a47Autowired注解原理.A47_2$Service2@be35cd9
解析@Primary 注解 当容器中有多个相同类型的 Bean 对象时, 在执行依赖注入时除了可以使用 @Qualifier注解外,
还可以在被注入的 Bean 对象所在的类上添加 @Primary注解, 指定依赖注入时使用的主要 Bean 对象。
如果 Bean 对象所在的类被 @Primary注解标记,在构造 BeanDefinition时会记录这个信息。
通常情况, @Primary注解只有一个作用在相同类型的 Bean 上,存在多个时, Spring 会抛出异常。
1 2 3 4 5 6 7 8 9 10 11 12 13 14 15 16 17 18 19 20 static class Target1 { @Autowired private Service service; } interface Service {} @Component("service1") static class Service1 implements Service {} @Primary @Component("service2") static class Service2 implements Service {} @Component("service3") static class Service3 implements Service {}
1 2 3 4 5 6 7 8 9 10 11 12 13 14 15 16 17 18 @SneakyThrows public static void main (String[] args) { AnnotationConfigApplicationContext context = new AnnotationConfigApplicationContext (A47_3.class); DefaultListableBeanFactory beanFactory = context.getDefaultListableBeanFactory(); testPrimary(beanFactory); } private static void testPrimary (DefaultListableBeanFactory beanFactory) throws NoSuchFieldException{ DependencyDescriptor dd1 = new DependencyDescriptor (Target1.class.getDeclaredField("service" ), Boolean.FALSE); String[] strings = BeanFactoryUtils.beanNamesForTypeIncludingAncestors(beanFactory, dd1.getDependencyType()); for (String string : strings) { if (beanFactory.getMergedBeanDefinition(string).isPrimary()) { System.out.println("string: " + string); } } }
默认规则 当容器存在多个相同类型的 Bean 对象时, 除了使用 @Qualifier或 @Primary注解外,
@Autowired注解还支持按照 成员变量名称进行匹配
1 2 3 4 5 6 7 8 9 10 11 12 13 14 15 16 17 18 19 20 static class Target2 { @Autowired private Service service3; } interface Service {} @Component("service1") static class Service1 implements Service {} @Primary @Component("service2") static class Service2 implements Service {} @Component("service3") static class Service3 implements Service {}
1 2 3 4 5 6 7 8 9 10 11 12 13 14 15 16 17 18 19 20 @SneakyThrows public static void main (String[] args) { AnnotationConfigApplicationContext context = new AnnotationConfigApplicationContext (A47_3.class); DefaultListableBeanFactory beanFactory = context.getDefaultListableBeanFactory(); testDefault(beanFactory); } private static void testDefault (DefaultListableBeanFactory beanFactory) throws NoSuchFieldException { DependencyDescriptor dd2 = new DependencyDescriptor (Target2.class.getDeclaredField("service3" ), Boolean.FALSE); String[] strings = BeanFactoryUtils.beanNamesForTypeIncludingAncestors(beanFactory, dd2.getDependencyType()); for (String string : strings) { if (ObjectUtil.equals(string, dd2.getDependencyName())){ System.out.println("string: " + string); } } }
48 . 事件 - 监听器 48 .1 监听器的实现 实现 ApplicationListener 类方式 1 2 3 4 5 6 7 8 9 10 11 12 13 14 15 16 17 18 19 20 21 22 23 24 25 26 27 28 29 30 31 32 33 34 35 36 37 38 39 40 41 42 43 44 45 46 47 48 49 50 51 52 53 54 55 56 57 58 59 @Slf4j @Configuration public class A48_1 { public static void main (String[] args) { AnnotationConfigApplicationContext context = new AnnotationConfigApplicationContext (A48_1.class); MyService bean = context.getBean(MyService.class); bean.doBusiness(); context.close(); } @Component static class Event extends ApplicationEvent { public Event (MyService source) { super (source); } } @Component static class MyService { @Autowired private ApplicationEventPublisher publisher; public void doBusiness () { log.info("执行业务逻辑" ); publisher.publishEvent(new Event (this )); } } @Component static class SmsEventListener implements ApplicationListener <Event> { @Override public void onApplicationEvent (Event event) { log.info("短信发送成功" ); } } @Component static class EmailEventListener implements ApplicationListener <Event>{ @Override public void onApplicationEvent (Event event) { log.info("发送邮件成功" ); } } }
1 2 3 10 :42 :23.975 [main] INFO dai.dawang.sundy.a48监听器.A48_1 -- 执行业务逻辑10 :42 :23.984 [main] INFO dai.dawang.sundy.a48监听器.A48_1 -- 发送邮件成功10 :42 :23.984 [main] INFO dai.dawang.sundy.a48监听器.A48_1 -- 短信发送成功
@EventListener 注解方式 1 2 3 4 5 6 7 8 9 10 11 12 13 14 15 16 17 18 19 20 21 22 23 24 25 26 27 28 29 30 31 32 33 34 35 36 37 38 39 40 41 42 43 44 45 46 47 48 49 50 51 52 53 54 55 56 57 58 59 @Slf4j @Configuration public class A48_2 { public static void main (String[] args) { AnnotationConfigApplicationContext context = new AnnotationConfigApplicationContext (A48_2.class); MyService bean = context.getBean(MyService.class); bean.doBusiness(); context.close(); } @Component static class Event extends ApplicationEvent { public Event (MyService source) { super (source); } } @Component static class MyService { @Autowired private ApplicationEventPublisher publisher; public void doBusiness () { log.info("执行业务逻辑" ); publisher.publishEvent(new Event (this )); } } @Component static class SmsEventListener { @EventListener public void onApplicationEvent (Event event) { log.info("短信发送成功" ); } } @Component static class EmailEventListener { @EventListener public void onApplicationEvent (Event event) { log.info("发送邮件成功" ); } } }
1 2 3 10 :34 :46.602 [main] INFO dai.dawang.sundy.a48监听器.A48_2 -- 执行业务逻辑10 :34 :48.767 [main] INFO dai.dawang.sundy.a48监听器.A48_2 -- 发送邮件成功10 :34 :48.767 [main] INFO dai.dawang.sundy.a48监听器.A48_2 -- 短信发送成功
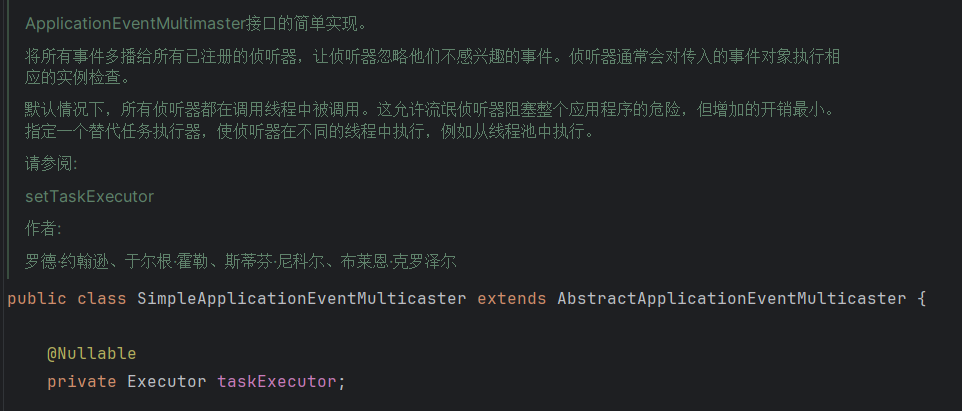
线程池异步方法 ApplicationEventPublisher 底层是用了 SimpleApplicationEventMulticaster来发布事件,
SimpleApplicationEventMulticaster 默认是单线程 即 不异步,
配置一个新线程池就可以多线程异步发送事件
1 2 3 4 5 6 7 8 9 10 11 12 13 14 15 16 17 18 19 20 21 22 23 24 25 26 27 28 29 30 31 32 33 34 35 36 37 38 39 40 41 42 43 44 45 46 47 48 49 50 51 52 53 54 55 56 57 58 59 60 61 62 63 64 65 66 67 @Slf4j @Configuration public class A48_3 { public static void main (String[] args) { AnnotationConfigApplicationContext context = new AnnotationConfigApplicationContext (A48_3.class); MyService bean = context.getBean(MyService.class); bean.doBusiness(); context.close(); } static class Event extends ApplicationEvent { public Event (MyService source) { super (source); } } @Component static class MyService { @Autowired private ApplicationEventPublisher publisher; public void doBusiness () { log.info("主线" ); publisher.publishEvent(new Event (this )); } } @Component static class SmsEventListener implements ApplicationListener <Event> { public void onApplicationEvent (Event event) { log.info("短信" ); } } @Component static class EmailEventListener { @EventListener public void onApplicationEvent (Event event) { log.info("邮箱" ); } } @Bean public ThreadPoolExecutor executor () { return new ThreadPoolExecutor (10 ,20 ,30 , TimeUnit.MINUTES,new ArrayBlockingQueue <>(100 )); } @Bean public SimpleApplicationEventMulticaster applicationEventMulticaster (ThreadPoolExecutor executor) { SimpleApplicationEventMulticaster multicaster = new SimpleApplicationEventMulticaster (); multicaster.setTaskExecutor(executor); return multicaster; } }
1 2 3 11 :47 :39.670 [main] INFO dai.dawang.sundy.a48监听器.A48_3 -- 主线11 :47 :39.675 [pool-1 -thread-1 ] INFO dai.dawang.sundy.a48监听器.A48_3 -- 短信11 :47 :39.675 [pool-1 -thread-2 ] INFO dai.dawang.sundy.a48监听器.A48_3 -- 邮箱
@Async 实现异步事件 在监听器 上添加 @Async注解 与 @EnableAsync 可实现异步事件:
1 2 3 4 5 6 7 8 9 10 11 12 13 14 15 16 17 18 19 @Slf4j @Component static class SmsService { @Async @EventListener public void listener (MyEvent myEvent) { log.debug("发送短信" ); } } @Slf4j @Component static class EmailService { @Async @EventListener public void listener (MyEvent myEvent) { log.debug("发送邮件" ); } }
1 2 3 4 5 6 7 8 9 10 11 12 13 14 15 16 17 18 19 20 21 22 23 24 @Slf4j @Configuration @EnableAsync(proxyTargetClass = true) public class TestAsync { public static void main (String[] args) { AnnotationConfigApplicationContext context = new AnnotationConfigApplicationContext (TestAsync.class); context.getBean(MyService.class).doBusiness(); context.close(); } @Bean public ThreadPoolTaskExecutor executor () { ThreadPoolTaskExecutor executor = new ThreadPoolTaskExecutor (); executor.setCorePoolSize(3 ); executor.setMaxPoolSize(10 ); executor.setQueueCapacity(100 ); return executor; } }
在使用 @EnableAsync注解时,指定 proxyTargetClass属性值为 true, 采用 CGLib 动态代理,
避免 监听器类实现接口 而监听器方法又未在基类声明导致默认的 JDK 动态代理失败。
48.2 EventListener 注解的原理 自定义 @MyListener 注解:
1 2 3 4 5 6 7 8 9 10 11 12 13 14 15 16 17 18 19 20 21 22 23 24 25 26 27 28 29 30 31 32 33 34 35 36 37 38 39 40 41 42 43 44 45 46 47 48 49 50 51 52 53 54 55 56 57 58 59 60 61 62 63 64 65 66 67 68 69 70 71 72 73 74 75 76 77 78 79 80 81 82 83 84 85 86 87 88 89 90 91 92 93 94 95 96 97 98 99 100 101 102 103 104 105 106 107 package dai.dawang.sundy.a48监听器;import lombok.extern.slf4j.Slf4j;import org.springframework.beans.factory.annotation.Autowired;import org.springframework.context.ApplicationEvent;import org.springframework.context.ApplicationEventPublisher;import org.springframework.context.ApplicationListener;import org.springframework.context.annotation.AnnotationConfigApplicationContext;import org.springframework.context.annotation.Bean;import org.springframework.context.annotation.Configuration;import org.springframework.context.event.SimpleApplicationEventMulticaster;import org.springframework.stereotype.Component;import java.lang.annotation.ElementType;import java.lang.annotation.Retention;import java.lang.annotation.RetentionPolicy;import java.lang.annotation.Target;import java.lang.reflect.Method;import java.util.concurrent.ArrayBlockingQueue;import java.util.concurrent.ThreadPoolExecutor;import java.util.concurrent.TimeUnit;@Slf4j @Configuration public class EventListener 注解原理 { public static void main (String[] args) { AnnotationConfigApplicationContext context = new AnnotationConfigApplicationContext (EventListener注解原理.class); EmailListener bean = context.getBean(EmailListener.class); for (Method method : EmailListener.class.getMethods()) { if (method.isAnnotationPresent(MyListener.class)) { ApplicationListener<Event> applicationListener = event -> { try { method.invoke(bean, event); } catch (Exception e) { throw new RuntimeException (e); } }; context.addApplicationListener(applicationListener); } } context.getBean(MyService.class).doBusiness(); context.close(); } @Component public static class Event extends ApplicationEvent { public Event (MyService source) { super (source); } } @Component public static class MyService { @Autowired private ApplicationEventPublisher publisher; public void doBusiness () { log.info("主线" ); publisher.publishEvent(new Event (this )); } } @Component public static class SmsListener implements ApplicationListener <Event> { public void onApplicationEvent (Event event) { log.info("短信监听器" ); } } @Component public static class EmailListener { @MyListener public void onApplicationEvent (Event event) { log.info("邮箱监听器" ); } } @Bean public ThreadPoolExecutor executor () { return new ThreadPoolExecutor (5 , 10 , 60 , TimeUnit.SECONDS, new ArrayBlockingQueue <>(10 )); } @Bean public SimpleApplicationEventMulticaster applicationEventMulticaster (ThreadPoolExecutor executor) { SimpleApplicationEventMulticaster multicaster = new SimpleApplicationEventMulticaster (); multicaster.setTaskExecutor(executor); return multicaster; } @Target(ElementType.METHOD) @Retention(RetentionPolicy.RUNTIME) public @interface MyListener { } }
1 2 3 11:51:04.572 [main] INFO dai.dawang.sundy.a48监听器.EventListener注解原理 -- 主线 11:51:04.582 [pool-1-thread-1] INFO dai.dawang.sundy.a48监听器.EventListener注解原理 -- 短信监听器 11:51:04.582 [pool-1-thread-2] INFO dai.dawang.sundy.a48监听器.EventListener注解原理 -- 邮箱监听器
Lambda 表达式的类型转换问题 如下两个 Lambda 有什么不同呢?
1 2 3 4 5 6 7 8 9 10 11 12 public static void main (String[] args) { ApplicationListener<Event> applicationListener = event -> { try { method.invoke(bean, event); } catch (Exception e) { throw new RuntimeException (e); } }; }
1 2 3 12:09:53.612 [main] INFO dai.dawang.sundy.a48监听器.EventListener注解原理 -- 主线 12:09:53.621 [pool-1-thread-1] INFO dai.dawang.sundy.a48监听器.EventListener注解原理 -- 短信监听器 12:09:53.621 [pool-1-thread-2] INFO dai.dawang.sundy.a48监听器.EventListener注解原理 -- 邮箱监听器
与
1 2 3 4 5 6 7 8 9 10 11 12 13 public static void main (String[] args) { ApplicationListener<Event> applicationListener = (ApplicationListener)event -> { try { method.invoke(bean, event); } catch (Exception e) { throw new RuntimeException (e); } }; }
1 2 3 4 12:10:31.654 [main] INFO dai.dawang.sundy.a48监听器.EventListener注解原理 -- 主线 12:10:31.663 [pool-1-thread-2] INFO dai.dawang.sundy.a48监听器.EventListener注解原理 -- 邮箱监听器 12:10:31.663 [pool-1-thread-1] INFO dai.dawang.sundy.a48监听器.EventListener注解原理 -- 短信监听器 Exception in thread "pool-1-thread-3" java.lang.RuntimeException: java.lang.IllegalArgumentException: argument type mismatch
1 2 3 4 5 6 7 8 9 10 11 12 13 14 15 16 17 18 public static void main (String[] args) { ApplicationListener<Event> applicationListener = new ApplicationListener () { public void onApplicationEvent (ApplicationEvent event) { try { method.invoke(bean, event); } catch (Exception e) { throw new RuntimeException (e); } } }; }
1 2 3 4 5 12:07:30.756 [main] INFO dai.dawang.sundy.a48监听器.EventListener注解原理 -- 主线 12:07:30.764 [main] INFO dai.dawang.sundy.a48监听器.EventListener注解原理 -- 短信监听器 12:07:30.764 [main] INFO dai.dawang.sundy.a48监听器.EventListener注解原理 -- 邮箱监听器 12:07:30.764 [main] WARN org.springframework.context.annotation.AnnotationConfigApplicationContext -- Exception thrown from ApplicationListener handling ContextClosedEvent java.lang.RuntimeException: java.lang.IllegalArgumentException: method.invoke(bean, event);
出现错误的根本原因是 context.close();时也会发送事件, 而关闭容器的事件被我们自定义的
ApplicationListener捕抓到后, 传入了 method.invoke(bean, event);参数,
所以出现 method.invoke(bean, event);异常。
解决方法如上直接表明我们自定义的 ApplicationListener类型是 Event
或者像老师P171里讲的 方法一样处理:
1 2 3 4 5 6 7 8 9 10 11 12 13 14 15 16 17 18 19 20 public static void main (String[] args) { ApplicationListener<Event> applicationListener = new ApplicationListener () { public void onApplicationEvent (ApplicationEvent event) { Class<?> parameterType = method.getParameterTypes()[0 ]; if (parameterType.isAssignableFrom(event.getClass())) { try { method.invoke(bean, event); } catch (Exception e) { throw new RuntimeException (e); } } } }; }
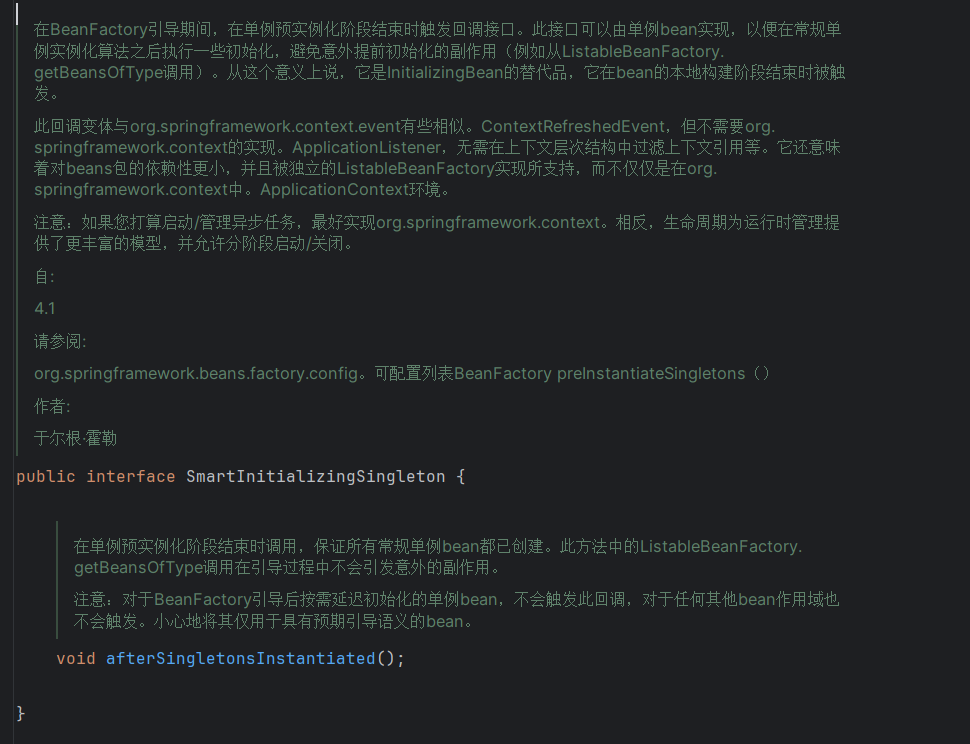
完善自定义 MyListener 注解 SmartInitializingSingleton类SmartInitializingSingleton接口是 所有的单例初始化后回调 <font style="background-color:rgba(255, 255, 255, 0);">afterSingletonsInstantiated()</font>方法
1 2 3 4 5 6 7 8 9 10 11 12 13 14 15 16 17 18 19 20 21 22 23 24 25 26 27 28 29 30 31 32 33 34 35 36 37 38 39 40 41 42 43 44 45 46 47 48 49 50 51 52 53 54 55 56 57 58 59 60 61 62 63 64 65 66 67 68 69 70 71 72 73 74 75 76 77 78 79 80 81 82 83 84 85 86 87 88 89 90 91 92 93 94 95 96 97 98 99 100 101 102 103 104 105 106 107 108 109 110 111 112 113 114 115 116 117 118 119 120 121 122 123 124 125 126 127 128 129 package dai.dawang.sundy.a48监听器;import lombok.extern.slf4j.Slf4j;import org.springframework.beans.factory.SmartInitializingSingleton;import org.springframework.beans.factory.annotation.Autowired;import org.springframework.context.ApplicationEvent;import org.springframework.context.ApplicationEventPublisher;import org.springframework.context.ApplicationListener;import org.springframework.context.annotation.AnnotationConfigApplicationContext;import org.springframework.context.annotation.Bean;import org.springframework.context.annotation.Configuration;import org.springframework.context.event.SimpleApplicationEventMulticaster;import org.springframework.stereotype.Component;import java.lang.annotation.ElementType;import java.lang.annotation.Retention;import java.lang.annotation.RetentionPolicy;import java.lang.annotation.Target;import java.lang.reflect.Method;import java.util.concurrent.ArrayBlockingQueue;import java.util.concurrent.ThreadPoolExecutor;import java.util.concurrent.TimeUnit;@Slf4j @Configuration public class EventListener 注解原理 { public static void main (String[] args) { AnnotationConfigApplicationContext context = new AnnotationConfigApplicationContext (EventListener注解原理.class); context.getBean(MyService.class).doBusiness(); context.close(); } @Bean public SmartInitializingSingleton smartInitializingSingleton (AnnotationConfigApplicationContext context) { return new SmartInitializingSingleton () { public void afterSingletonsInstantiated () { for (String beanDefinitionName : context.getBeanDefinitionNames()) { Object bean = context.getBean(beanDefinitionName); for (Method method : bean.getClass().getMethods()) { if (method.isAnnotationPresent(MyListener.class)) { ApplicationListener<Event> applicationListener = new ApplicationListener () { public void onApplicationEvent (ApplicationEvent event) { System.out.println(event); Class<?> parameterType = method.getParameterTypes()[0 ]; if (parameterType.isAssignableFrom(event.getClass())) { try { method.invoke(bean, event); } catch (Exception e) { throw new RuntimeException (e); } } } }; context.addApplicationListener(applicationListener); } } } } }; } @Component public static class Event extends ApplicationEvent { public Event (MyService source) { super (source); } } @Component public static class MyService { @Autowired private ApplicationEventPublisher publisher; public void doBusiness () { log.info("主线" ); publisher.publishEvent(new Event (this )); } } @Component public static class SmsListener implements ApplicationListener <Event> { public void onApplicationEvent (Event event) { log.info("短信监听器" ); } } @Component public static class EmailListener { @MyListener public void onApplicationEvent (Event event) { log.info("邮箱监听器" ); } } @Bean public ThreadPoolExecutor executor () { return new ThreadPoolExecutor (5 , 10 , 60 , TimeUnit.SECONDS, new ArrayBlockingQueue <>(10 )); } @Bean public SimpleApplicationEventMulticaster applicationEventMulticaster (ThreadPoolExecutor executor) { SimpleApplicationEventMulticaster multicaster = new SimpleApplicationEventMulticaster (); multicaster.setTaskExecutor(executor); return multicaster; } @Target(ElementType.METHOD) @Retention(RetentionPolicy.RUNTIME) public @interface MyListener { } }
1 2 3 4 5 6 12:58:31.536 [main] INFO dai.dawang.sundy.a48监听器.EventListener注解原理 -- 主线 dai.dawang.sundy.a48监听器.EventListener注解原理$Event[source=dai.dawang.sundy.a48监听器.EventListener注解原理$MyService@212d2122] 12:58:31.541 [pool-1-thread-2] INFO dai.dawang.sundy.a48监听器.EventListener注解原理 -- 短信监听器 12:58:31.542 [pool-1-thread-3] INFO dai.dawang.sundy.a48监听器.EventListener注解原理 -- 邮箱监听器 org.springframework.context.event.ContextClosedEvent[source=org.springframework.context.annotation.AnnotationConfigApplicationContext@35fb3008, started on Sun Oct 06 12:58:31 CST 2024] org.springframework.context.event.ContextRefreshedEvent[source=org.springframework.context.annotation.AnnotationConfigApplicationContext@35fb3008, started on Sun Oct 06 12:58:31 CST 2024]
48.3 监听器执行顺序 当一个事件有多个对应监听器时, 监听器执行顺序是不确认的。
可以重写 SmartApplicationListener#getOrder() 方法指定优先级。
也可以使用 @Order注解指定优先级。
1 2 3 4 5 6 7 8 9 10 11 12 13 14 15 16 17 18 19 20 21 22 23 24 25 26 27 28 29 30 31 32 33 34 35 36 37 38 39 40 41 42 43 44 45 46 47 48 49 50 51 52 53 54 55 56 57 58 59 60 61 62 63 64 65 66 67 68 69 70 71 72 73 74 75 76 77 78 79 80 @Slf4j @Configuration public class 监听器执行顺序 { public static void main (String[] args) { AnnotationConfigApplicationContext context = new AnnotationConfigApplicationContext (监听器执行顺序.class); MyService bean = context.getBean(MyService.class); bean.doBusiness(); context.close(); } @Component static class MyService { @Autowired private ApplicationEventPublisher publisher; public void doBusiness () { log.info("主线" ); publisher.publishEvent(new MyEvent (this )); } } static class MyEvent extends ApplicationEvent { public MyEvent (Object source) { super (source); } } @Component static class SmsService1 { @Order(2) @EventListener public void listener (MyEvent event) { log.info("短信服务1" ); } } @Component static class EmailService1 { @Order(1) @EventListener public void listener (MyEvent event) { log.info("邮件服务1" ); } } @Component static class SmsService2 implements ApplicationListener <MyEvent>, Ordered { @Override public void onApplicationEvent (MyEvent event) { log.info("短信服务2" ); } @Override public int getOrder () { return 3 ; } } @Component static class EmailService2 implements ApplicationListener <MyEvent>, Ordered { @Override public void onApplicationEvent (MyEvent event) { log.info("邮件服务2" ); } @Override public int getOrder () { return 4 ; } } }
1 2 3 4 5 16 :29 :32.913 [main] INFO dai.dawang.sundy.a48监听器.监听器执行顺序 -- 主线16 :29 :32.917 [main] INFO dai.dawang.sundy.a48监听器.监听器执行顺序 -- 邮件服务1 16 :29 :32.917 [main] INFO dai.dawang.sundy.a48监听器.监听器执行顺序 -- 短信服务1 16 :29 :32.917 [main] INFO dai.dawang.sundy.a48监听器.监听器执行顺序 -- 短信服务2 16 :29 :32.917 [main] INFO dai.dawang.sundy.a48监听器.监听器执行顺序 -- 邮件服务2
48.4 带泛型的事件 创建一个事件类 ,接收一个泛型参数:
1 2 3 4 5 6 7 8 9 10 11 12 13 14 @Getter static class MutationEvent <T> extends ApplicationEvent { private static final long serialVersionUID = -2718823625228147843L ; private final T source; private final String type; public MutationEvent (T data, String type) { super (data); this .source = data; this .type = type; } }
事件监听器:
1 2 3 4 5 6 7 8 9 10 11 12 13 14 15 16 17 18 19 20 21 22 23 24 25 26 27 28 29 30 31 32 33 @Getter @AllArgsConstructor static class Pizza { private final String name; private final double price; } @Getter @AllArgsConstructor static class ChineseHamburger { private final double price; private final String size; } static class MutationEventListener { @EventListener public void handlePizza (MutationEvent<Pizza> event) { System.out.println("监听到 Pizza..." ); System.out.println("类型是: " + event.getType()); Pizza pizza = event.getSource(); System.out.println("Pizza 名称为: " + pizza.getName() + ", 价格为: " + pizza.getPrice()); } @EventListener public void handleChineseHamburger (MutationEvent<ChineseHamburger> event) { System.out.println("监听到肉夹馍..." ); System.out.println("类型是: " + event.getType()); ChineseHamburger hamburger = event.getSource(); System.out.println("肉夹馍的价格是: " + hamburger.getPrice() + ", 大小是: " + hamburger.getSize()); } }
尝试发布 MutationEvent 类型的事件,看看监听器是否能监听到:
1 2 3 4 5 6 7 8 public static void main (String[] args) { AnnotationConfigApplicationContext context = new AnnotationConfigApplicationContext (); context.registerBean(MutationEventListener.class); context.refresh(); Pizza pizza = new Pizza ("NewYorkPizza" , 25 ); context.publishEvent(new MutationEvent <>(pizza, "ONE" )); }
抛出 ClassCastException异常, 无法将Pizza 转换成 ChineseHamburger,事件监听失败。
需要实现 ResolvableTypeProvider接口,解决泛型擦除的问题
如果未实现 ResolvableTypeProvider接口,
但是实现了 ApplicationEvent接口, 尽管监听器方法和发布事件时都指定了泛型参数信息, 但所有的监听器方法都执行, 还是会抛出 ClassCastException异常。
同时未实现 ApplicationEvent接口, 就算发送的泛型事件的内部对象类型 与 监听器指定泛型事件内部对象类型一样, 也不会监听成功
1 2 3 4 5 6 7 8 9 10 11 @Getter static class MutationEvent <T> extends ApplicationEvent implements ResolvableTypeProvider { @Override public ResolvableType getResolvableType () { return ResolvableType.forClassWithGenerics(getClass(), ResolvableType.forInstance(this .source)); } }
1 2 3 监听到 Pizza... 类型是: ONE Pizza 名称为: NewYorkPizza, 价格为: 25.0
再发布泛型参数类型 的事件:
1 2 3 4 5 6 7 public static void main (String[] args) { ChineseHamburger hamburger = new ChineseHamburger (18 , "M" ); context.publishEvent(new MutationEvent <>(hamburger, "TWO" )); }
1 2 3 4 5 6 监听到 Pizza... 类型是: ONE Pizza 名称为: NewYorkPizza, 价格为: 25.0 监听到肉夹馍... 类型是: TWO 肉夹馍的价格是: 18.0, 大小是: M
49 . 事件 - 发布器 49.1 自定义事件发布 SmartInitializingSingleton的基类 ApplicationEventMulticaster有两个方法
addApplicationListenerBean()收集监听器, 找到所有实现了 ApplicationListener 接口的 BeanmulticastEvent发布事件, ApplicationEventPublisher#publishEvent() 方法内部就是调用 multicastEvent
监听器收集时, 需要获取监听器支持的事件类型, 将原始的监听器封装为支持事件类型检查的监听器, 发布事件时使用线程池支持异步发送。
发布事件时,遍历容器所有监听器,当监听器支持的事件类型 与 发布事件的类型一致时才发布事件。
而用@ApplicationListener 注解与 实现 ApplicationListener 接口也是有区别的
1 2 3 4 5 6 7 8 9 10 11 12 13 14 15 16 17 18 19 20 21 22 23 24 25 26 27 28 29 30 31 32 33 34 35 36 37 38 39 40 41 42 43 44 45 46 47 48 49 50 51 52 53 54 55 56 57 58 59 60 61 62 63 64 65 66 67 68 69 70 71 72 73 74 75 76 77 78 79 80 81 82 83 84 85 86 87 88 89 90 91 92 93 94 95 96 97 98 99 100 101 102 103 104 105 106 107 108 109 110 111 112 113 114 115 116 117 118 @Slf4j @Configuration public class a49 { public static void main (String[] args) { AnnotationConfigApplicationContext context = new AnnotationConfigApplicationContext (a49.class); MyService bean = context.getBean(MyService.class); bean.doBusiness(); context.close(); } @Component static class Event extends ApplicationEvent { public Event (MyService source) { super (source); } } @Component static class MyService { @Autowired private ApplicationEventPublisher publisher; public void doBusiness () { log.info("执行业务逻辑" ); publisher.publishEvent(new Event (this )); } } @Component static class SmsEventListener implements ApplicationListener <Event>{ public void onApplicationEvent (Event event) { log.info("短信发送成功" ); } } @Component static class EmailEventListener { @EventListener public void onApplicationEvent (Event event) { log.info("发送邮件成功" ); } } @Bean public ApplicationEventMulticaster applicationEventMulticaster (AnnotationConfigApplicationContext executor) { return new AbstractApplicationEventMulticaster (){ @Override public void addApplicationListenerBean (String listenerBeanName) { System.out.println(listenerBeanName); } @Override public void multicastEvent (ApplicationEvent event) { System.out.println("自定义事件发布器" ); } }; } abstract static class AbstractApplicationEventMulticaster implements ApplicationEventMulticaster { @Override public void addApplicationListener (ApplicationListener<?> listener) { } @Override public void addApplicationListenerBean (String listenerBeanName) { } @Override public void removeApplicationListener (ApplicationListener<?> listener) { } @Override public void removeApplicationListenerBean (String listenerBeanName) { } @Override public void removeApplicationListeners (Predicate<ApplicationListener<?>> predicate) { } @Override public void removeApplicationListenerBeans (Predicate<String> predicate) { } @Override public void removeAllListeners () { } @Override public void multicastEvent (ApplicationEvent event) { } @Override public void multicastEvent (ApplicationEvent event, ResolvableType eventType) { } } }
1 2 dai.dawang.sundy.a49发布器.a49$SmsEventListener 09:57 :12.991 [main] INFO dai.dawang.sundy.a49发布器.a49 -- 执行业务逻辑
49.2 非 ApplicationEvent 事件 如果发送的事件不是 ApplicationEvent类型时 , Spring 会将其包装为 PayloadApplicationEvent并用泛型技术解析事件对象的原始类型。
包装为 PayloadApplicationEvent类型的逻辑无需实现, 直接使用即可。
1 2 3 4 5 6 7 8 9 10 11 @Configuration public class TestEventPublisher { public static void main (String[] args) { AnnotationConfigApplicationContext context = new AnnotationConfigApplicationContext (TestEventPublisher.class); context.publishEvent(new Object ()); context.publishEvent("aaaa" ); context.publishEvent(new Bean1 ()); } }
1 2 3 4 5 6 7 8 9 10 11 12 13 14 15 16 17 18 19 20 21 22 23 24 25 26 27 28 29 30 31 32 33 34 35 36 37 38 39 40 41 42 43 44 45 46 47 48 49 50 51 52 53 54 55 56 57 58 59 60 61 62 63 64 65 66 67 interface Inter {} static class Bean1 implements Inter {} @Bean @SuppressWarnings("all") public ApplicationEventMulticaster applicationEventMulticaster (ConfigurableApplicationContext context, ThreadPoolTaskExecutor executor) { return new A49 .AbstractApplicationEventMulticaster() { private List<GenericApplicationListener> listeners = new ArrayList <>(); { listeners.add(new GenericApplicationListener () { @Override public void onApplicationEvent (ApplicationEvent event) { if (event instanceof PayloadApplicationEvent) { PayloadApplicationEvent<?> payloadApplicationEvent = (PayloadApplicationEvent<?>) event; System.out.println("被发送不是ApplicationEvent类型的事件为: " ); System.out.println(payloadApplicationEvent.getPayload()); } } @Override public boolean supportsEventType (ResolvableType eventType) { System.out.println(eventType); return (Inter.class.isAssignableFrom(eventType.getGeneric().toClass())); } }); } @Override public void multicastEvent (ApplicationEvent event) { multicastEvent(event, null ); } @SuppressWarnings("all") @Override public void multicastEvent (ApplicationEvent event, ResolvableType eventType) { listeners.stream().filter(applicationListener -> { if (eventType == null ) { return false ; } if (applicationListener instanceof GenericApplicationListener) { GenericApplicationListener listener = (GenericApplicationListener) applicationListener; return listener.supportsEventType(eventType); } return false ; }).forEach(listener -> listener.onApplicationEvent(event)); } }; } @Bean public ThreadPoolTaskExecutor executor () { ThreadPoolTaskExecutor executor = new ThreadPoolTaskExecutor (); executor.setCorePoolSize(3 ); executor.setMaxPoolSize(10 ); executor.setQueueCapacity(100 ); return executor; }
1 2 3 4 5 6 org.springframework.context.event.ContextRefreshedEvent org.springframework.context.PayloadApplicationEvent<java.lang.Object> org.springframework.context.PayloadApplicationEvent<java.lang.String> org.springframework.context.PayloadApplicationEvent<dai.dawang.sundy.a49发布器.TestEventPublisher$Bean1> 被发送不是ApplicationEvent类型的事件为: dai.dawang.sundy.a49发布器.TestEventPublisher$Bean1@242b836
看到ContextRefreshedEvent 事件 就是 创建 AnnotationConfigApplicationContext时 容器初始化 发送的事件,
后面 3 行是我们在 main() 方法里发送的 3 个事件。
在之前的文章里我们介绍了SpringBoot启动的流程 : 39.boot 启动流程 。在调用 start()方法时会发送 starting 事件、running 事件 与 failed 事件。
Spring 容器相关事件还有如下事件:
事件类型
触发时机
ContextRefreshedEvent
在调用 ConfigurableApplicationContext 接口中的 refresh() 方法时触发
ContextStartedEvent
在调用 ConfigurableApplicationContext 的 start() 方法时触发
ContextStoppedEvent
在调用 ConfigurableApplicationContext 的 stop() 方法时触发
ContextClosedEvent
当 ApplicationContext 被关闭时触发该事件,也就是调用 close() 方法触发